Photobucket Photobucket Photobucket Photobucket Photobucket Photobucket Photobucket

Monday, September 5, 2011

Chore Chart That Works!

Chore charts have never worked around here.  And I have tried MANY!  Recently, however, I came up with a system that actually WORKS!  It has been running smoothly for over a month now, so I wanted to share it with you.

I have always been torn between paying my kids to do chores, and making them do them because they live here.  I understand that they need money to learn how to save, budget, etc., but I also believe they need to do jobs simply because they are part of this family.

Enter my mixture of both.

I came up with 2 charts.  The first chart is called our Daily Chore Chart.
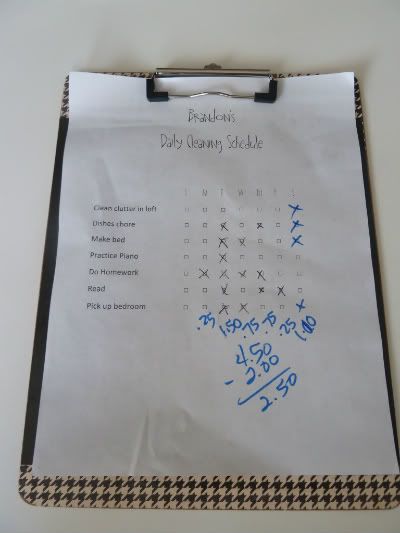
On this are simple little things that need to be done daily.  Make bed, pick up room, practice piano, do homework.  You get the idea.  For each item checked on this chart, my kids get 25 cents.

The second chart is our Weekly Chore Chart.
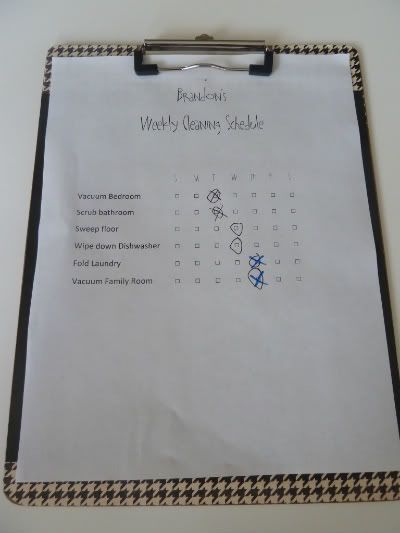
This has large (and some not so large) projects that are mandatory.  For each item NOT checked off on this list, my kids lose 1 dollar.  I call it rent.
I let my kids circle which day they are going to do each chore on this chart.  They have always hated doing everything on Saturday.  Fine!  Do it whenever you like.

At first, they didn't love this idea.  25 cents doesn't seem like a lot. That was until they discovered how much they could earn every week.  Up to $9.00!  Wow!  For an 8 or 10 year old that is a LOT of money!

Before you cringe and think I am WAY overpaying my kids, the average around here is $5 for the 10 year old and $2.50 for the 8 year old.  She has made it up to $9.00 one week.  Once.  I about croaked.  But one week she got $1.25 and he got 25 cents.  Ha!

Do I still have to harp on my kids?  Yes, but in a less bossy way.  It's more like, "Check your clip board!"  And we still have the rule of no wii, tv or computer until everything is done.

Small Details:  
*My kids are responsible for checking off these boxes on their own.  If they forget, they don't get paid.
*I add up the totals on Sunday morning.  I have to make sure I have the cash to pay them.  If I want them to be responsible, I need to be responsible in paying them.
*After getting paid, we split into save, donate and spend.
*My 3-year-old has a joint chart with mommy.  She doesn't get paid.  :)
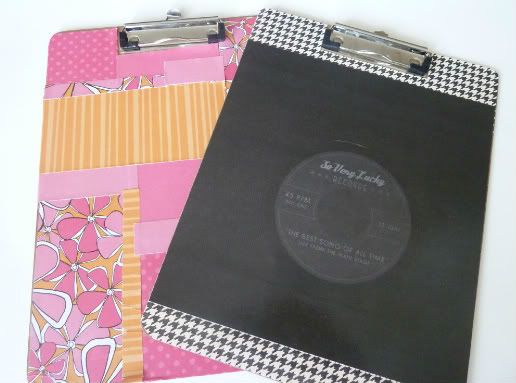
*As a big kick off, I gave my kids each a wooden clipboard from the dollar store, a stack of scrapbook paper and a bottle of mod-podge.  Then I let them go at it.  They loved it!

Linked up today at:  Tater Tots and Jell-o, Skip to my Lou, Lolly Jane, Home Stories AtoZ, Hope Studios, Todays Creative Blog, The Idea Room

Friday, September 2, 2011

How much is too much?

How much would you spend on a piece of furniture from Craigslist?  $50?  $75?

First:  The Dilemma
My 10 year-old has no closet in her room.  It's "technically" a den.

Second:  The Solution
I debated this solution from Young House Love.  Which is to add a couple of small wardrobes to the sides of the bed.  They used IKEA wardrobes and spent over $400.  YIKES!

So I was looking on Craigslist and found this antique wardrobe for $200, non-negotiable.  Oh, that is a lot of money.


It measures about 7' x 4 1/2'
The seller broke the mirror  that covered the door, thus losing the value of this antique he inherited.  His father bought it 30 years ago from an antique store in Los Angeles for $2500.  It's date stamped 1906 on it.

What do you think?  Am I a sucker?  Did staring at cheap-o Ikea furniture for too long thwart my judgement?

I'm thinking (being that it is solid wood) of staining it a lovely dark brown.  And maybe some cute fabric to cover the door?   Share your thoughts and ideas with me!

Thursday, September 1, 2011

Welcome!

Welcome to my new blog, Home Delicious!  I am still in the process of getting this all under control, but look around and get comfortable!  We're going to have a lot of fun!

Saturday, August 27, 2011

Fun at DownEast Basics

A few nights ago, DownEast Basics hosted a super-fun bloggers night to show us their new fall line.  I was thrilled with this because after all that school shopping for the kids, it's time for a little back-to-school shopping for mommy! We had a ball, running around meeting other local bloggers, but mostly SHOPPING! They have this great in-store promo - spend $50, get this purse for only $15!  Hello!  I snatched the yellow one, it was so needed!  Kelli from Lolly Jane was laughing so hard at my previous purse, she said I needed to send it back to Italy!  LOL!
They also have this great new kids line.  My 10-year-old has been begging me for a tu-tu-like skirt.  I keep telling her they don't make them in her size, but lo and behold.  We bought a super cute one there!
Ours was in bubblegum, but you get the gist!
DownEast was kind enough to give us each $25 to spend!
SO, to make it EVEN MORE FUN, DownEast is hosting an in-store giveaway for YOU LOCALS! Visit any DownEast Basics store in the Phoenix metro area from 8/29-9/12 & enter to win a fall fashion makeover! 1 lucky winner receives $250 shopping spree + DownEast will donate $250 to a local school of winner’s choice! I am totally going down there!  There were a few items on my list I didn't quite pick up yet.  See you there?

Monday, August 15, 2011

White Bread

This weekend I had this urge to bake bread.  Not just any bread, but wheat bread.  I found myself texting my mom late Friday night.  My mom has everything. Me:  Do u have a wheat grinder and wheat? Her:  yes Me:  Electric or hand? Her:  Electric Woohoo!  So I swung by on Saturday to pick it up.  This is what I found.
And here's another view.
ummmmmm.  I think it's older than me.  And I'm not young, friends.  Hitting 38 soon here.  At least it matches my Bosch, also older than me.
I happily switched my plans to white bread, as I wasn't too sure of what critters were living in that grinder.  I guess all those spider webs that were covering it could be healthy, but we were having people over for dinner.  Why risk it.
I wanted to share my never fail white bread recipe with you.  A few of you have told me you don't think you can make bread.  It's so easy!  No kneading or anything that takes too much time or energy.    That being said, you do need to make sure you are home to punch it down every so often.  And it's definitely worth the effort as it tastes 1000 times better than store bought.
White Bread
yeild:  2 loaves
Ingredients:
1 Tablespoon yeast
1/4 cup warm water
2 cups warm milk
1/4 cup oil
2 Tablespoons sugar
1/2 Tablespoon salt
5 - 6 cups white flour 
In your kitchenaid or Bosch or whatever you have (A big bowl?), put in yeast and warm water.  The water should just be luke-warm.  NOT hot.  While that sits softening up, warm up the milk in the microwave just until luke-warm.  Now add everything except the flour.  
Ready for the flour?  Add it one cup at a time.  After 4 cups start to watch the thickness of the dough.  Keep adding flour just until it comes away from the side of the bowl.  It will be a little sticky.  I added 5 1/4 cups to mine. That is my usual amount in Arizona, but I guess if you have more humidity, yours could need a little more.  When you have enough flour added, keep it mixing until all the flour is incorporated.
Spray a bowl with Pam and transfer dough to bowl.  Flip it over so both sides are covered in spray.  Let it rise about an hour.  Punch it.  Let it rise again another hour .  Split it into two loaves, and place them in 2 bread pans sprayed with Pam.  Let rise once again about 30 minutes.  Bake at 350 for 35 minutes.
Yummy!

Monday, August 8, 2011

Sprucing up those backpacks!

School started today and I am doing the happy dance.  
I LOVE it when school is out, but I also LOVE it when it starts back up.  It's definitely time.
Has anyone else used their cricut/silhouette to spruce up their backpacks?  If so, leave me the link!  I'd love to see!

Friday, August 5, 2011

Back to School – Teacher Survivor Can

Last night was Meet the Teacher night at school.  The kids and I decided to make a quick survival can for the teacher's first week of school.
Supplies needed:
pop top can (I use something I can freeze for smoothies later) 
can opener that doesn't "cut" the can such as a pampered chef one
treats to fill the can i.e.  candy, gum, post it notes, etc
tissue paper
hot glue gun
scrapbook paper
ribbon to embellish
To start, flip that can upside down and remove the lid with the can opener.  Wash and dry.
Fill the can with treats.  Place tissue at the top to protect the items from glue.
Hot glue the lid on to the top
 Take off the label and add some scrapbook paper.  Tie some ribbon on the tab on the top and you are done!
Have a great first week of school!