And the winner of the birthday package has been chosen via Random.org.
The winner is:
#1
Melanie at Bear RabbitBear!
Honestly, when does number 1 get chosen? She must be lucky!
Congratulations Melanie! I will send you an email today! Have a great Sunday!


Sunday, October 23, 2011

Friday, October 21, 2011
Primary Program Invitations
In case you didn't know, I'm a Mormon!
We have a program at Church every year completely put on by the children ages 3 - 11. I love it! This year, I get to make the invitations for this wonderful event!
 I wanted to share the fun invitations I made using the picture found here and picnik. I just loved this artwork. Especially the cute banner across the top. Love!
I am going to print them off at Costco like a regular photo print and pop them in envelopes! Simple and cute!
We have a program at Church every year completely put on by the children ages 3 - 11. I love it! This year, I get to make the invitations for this wonderful event!

I am going to print them off at Costco like a regular photo print and pop them in envelopes! Simple and cute!
Wednesday, October 19, 2011
It's my Birthday! {GIVEAWAY!!!}
THIS GIVEAWAY IS NOW CLOSED! :)
Yes, it's my birthday!!! I am getting older and older. To celebrate, I decided to have a little giveaway.
Note: This giveaway is not sponsored by anyone other than MYSELF. Because I love you guys and want to have a party! The patterns, however, are left over from a HouseParty I hosted. The gift card is purchased by myself.
Up for grabs are:
 2 patterns from Simplicity.
One is a learn to sew pattern with some cute skirts and the other is for some cute purses!
And
a $10 gift card to either JoAnns, Michaels or Hobby Lobby. You choose.
So, want to enter? Here are the rules:
1) Follow me on Google. Leave me a note saying you do. Or get my emails. Either way. :)
2) like me on Facebook and let me know you do.
That's it! If you don't have your email hooked up to your account, please leave me your email address.
Giveaway open until Saturday at midnight.
Good luck!
Yes, it's my birthday!!! I am getting older and older. To celebrate, I decided to have a little giveaway.
Note: This giveaway is not sponsored by anyone other than MYSELF. Because I love you guys and want to have a party! The patterns, however, are left over from a HouseParty I hosted. The gift card is purchased by myself.
Up for grabs are:
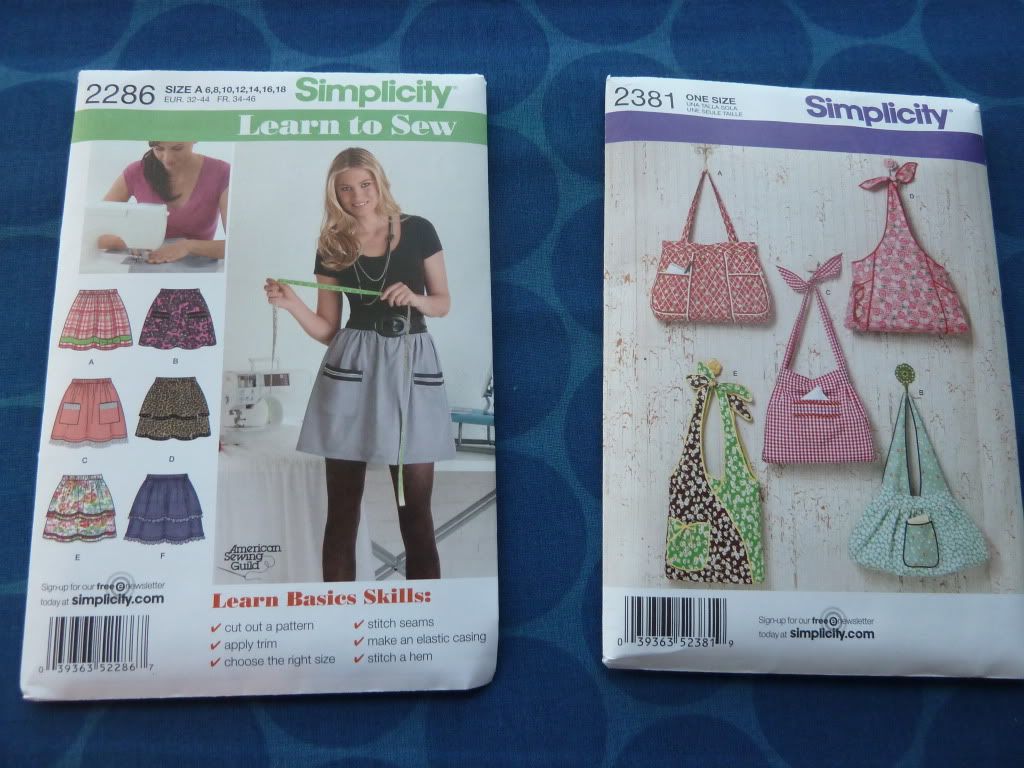
One is a learn to sew pattern with some cute skirts and the other is for some cute purses!
And
a $10 gift card to either JoAnns, Michaels or Hobby Lobby. You choose.
So, want to enter? Here are the rules:
1) Follow me on Google. Leave me a note saying you do. Or get my emails. Either way. :)
2) like me on Facebook and let me know you do.
That's it! If you don't have your email hooked up to your account, please leave me your email address.
Giveaway open until Saturday at midnight.
Good luck!
Tuesday, October 18, 2011
Sugar String Pumpkins
Lil Luna has the Great Pumpkin going on... have you stopped by?
Last week my family spend fall break in Utah (more on that later) and got to do a guest post for Kristyn at Lil Luna. In case you missed it, here is the tutorial I shared.
Sugar String Pumpkins!
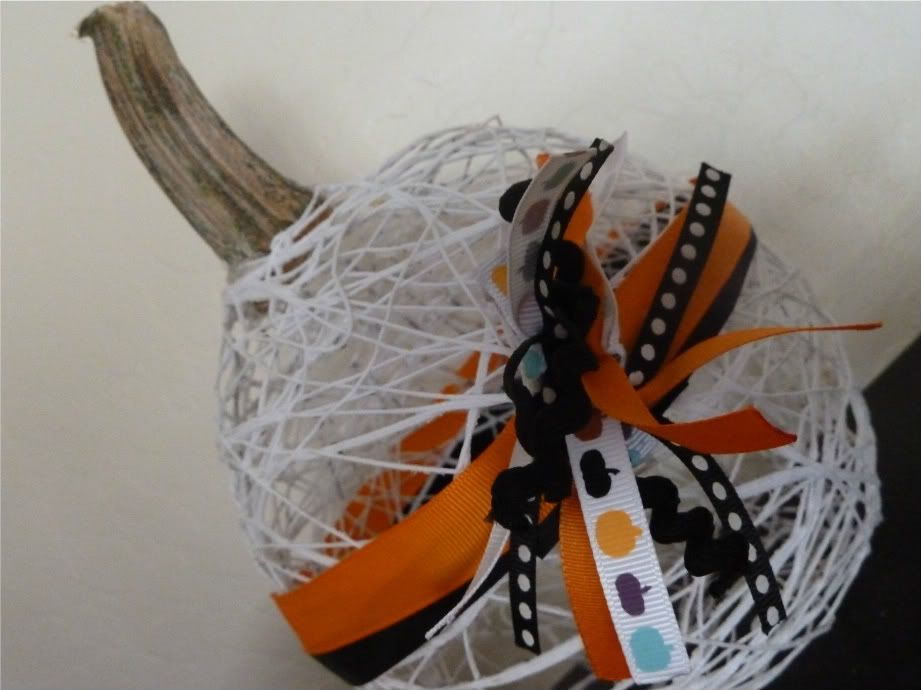
I was first introduced to sugar string by my sis-in-law Julee a few Easters ago. They are fun to make and look great! For the first time, I have Halloweened them up!
To start off, you will need balloons (I got mine from the dollar store), string, sugar and water.
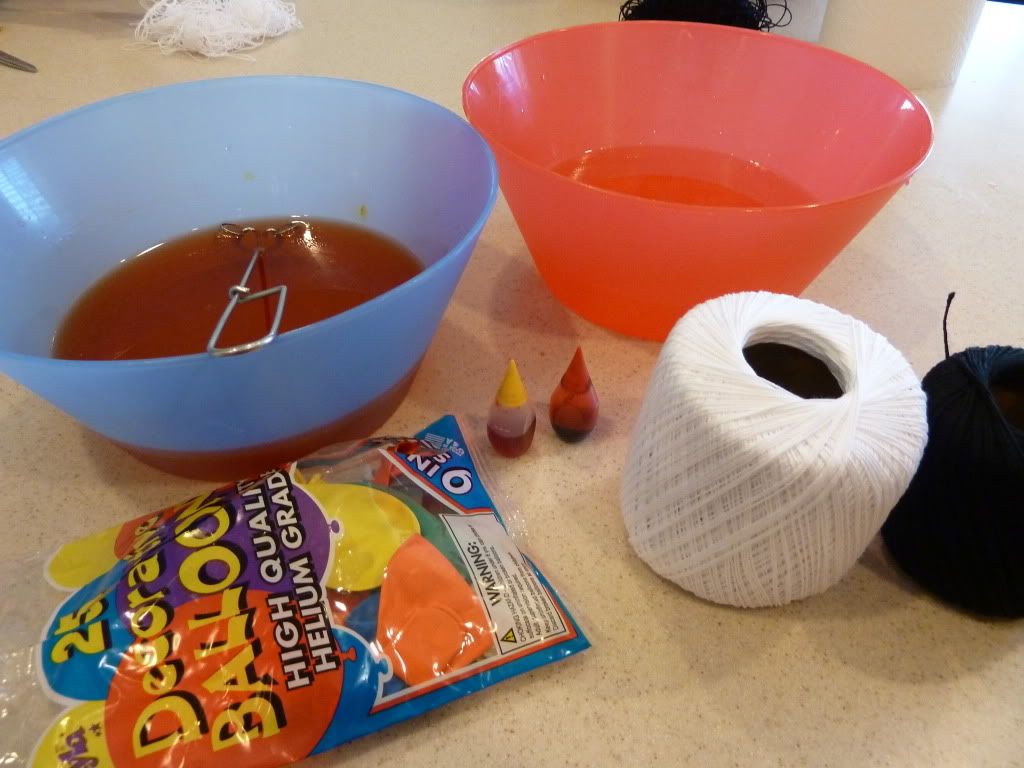
In a microwave-safe bowl, put 1 cup of water and heat it in the microwave. Don't boil it, but it does need to be hot. Then add 2 cups of sugar. If you use less water, that is OK, just make sure you are using a 2:1 sugar/water ratio. Stir that sugar in the water until it is dissolved, then let it cool. You may notice I added a little food coloring to the water to see if it would dye the string. It didn't. lol.
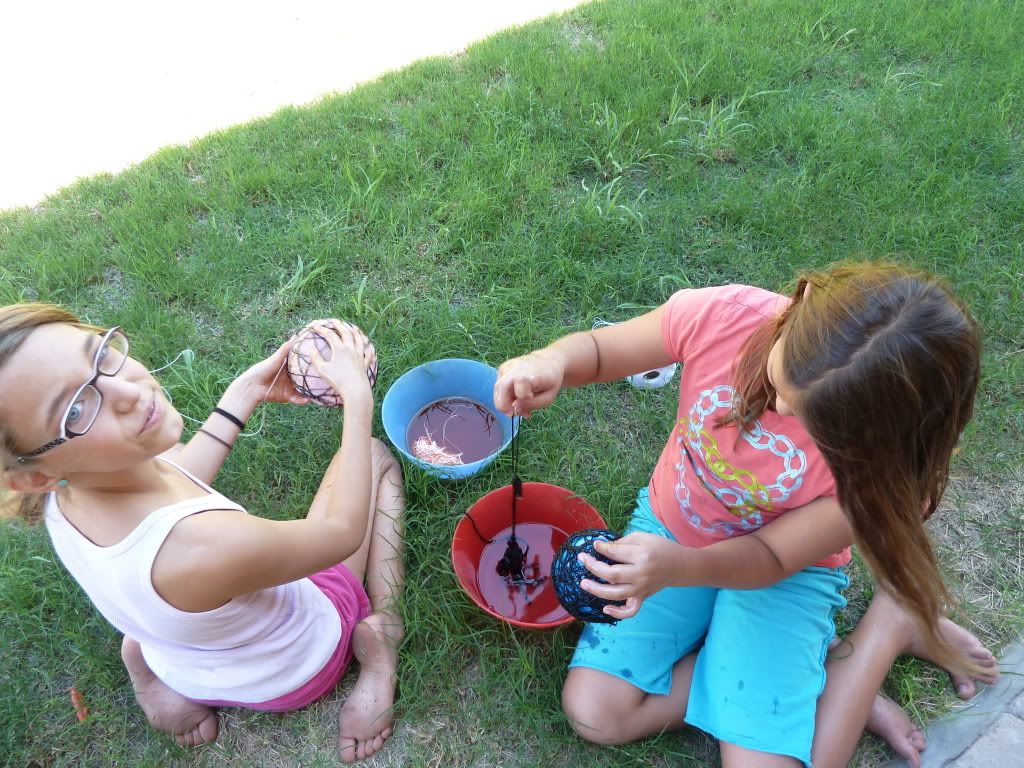
The next step is to wrap the string around the balloon. Note: We did this OUTSIDE! It gets MESSY! We tried this a few different ways, but the best was to wrap the string all around the balloon while they are both dry. Just wrap wrap wrap.
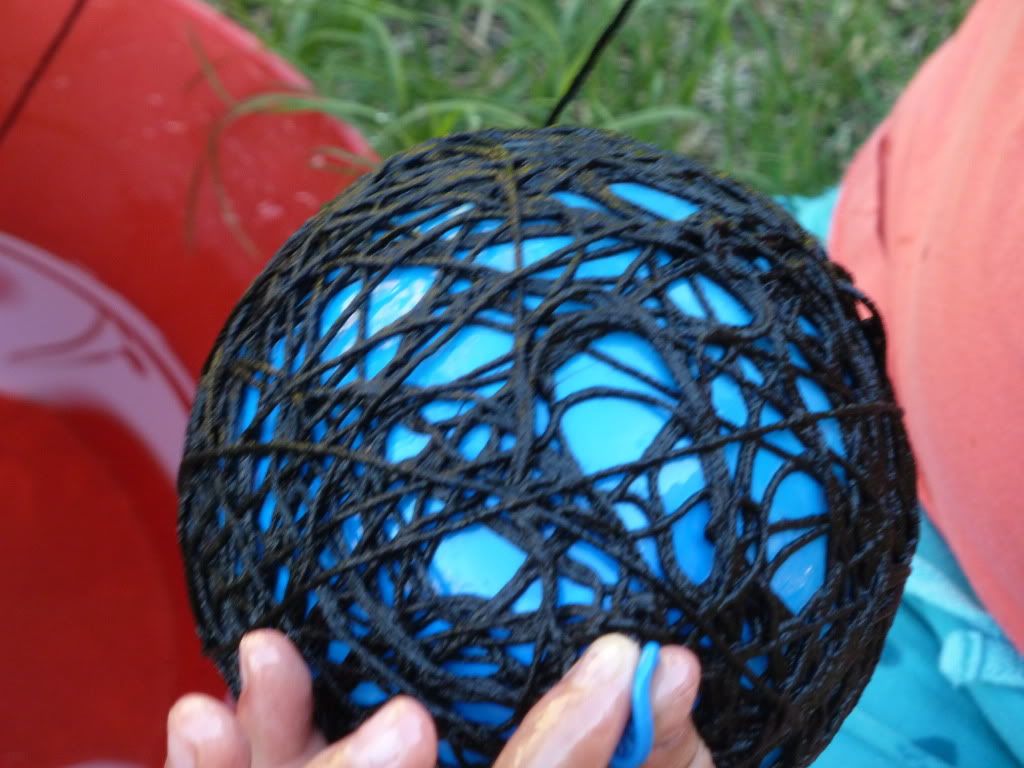
Then, roll it around in the sugar water bowl. Roll and spread with your hands until the entire thing is wet. All the string must be wet for this to work.
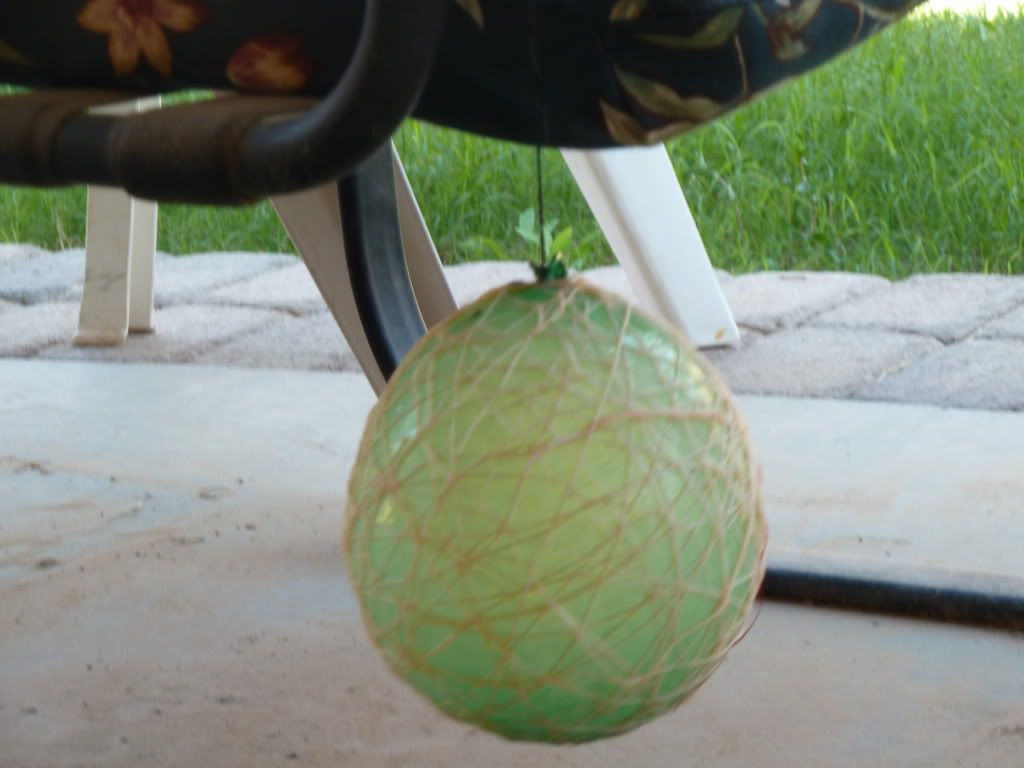
Hang it outside to dry. Note to Arizona moms: If it is too hot outside, the balloon will deflate. We learned the hard way and they looked more like spider sacks than pumpkins. I dried a few in the house over the sink. These will drip, though. So make sure it is over something you can hose off or clean easily.
When they are dry (the next day), pop the balloon and remove. You will have the cutest pumpkin shape!
Embellish with ribbon or whatever you like. I used a twig for a stem on one, and an actual pumpkin stem for the other stuck on there with a hot glue gun.
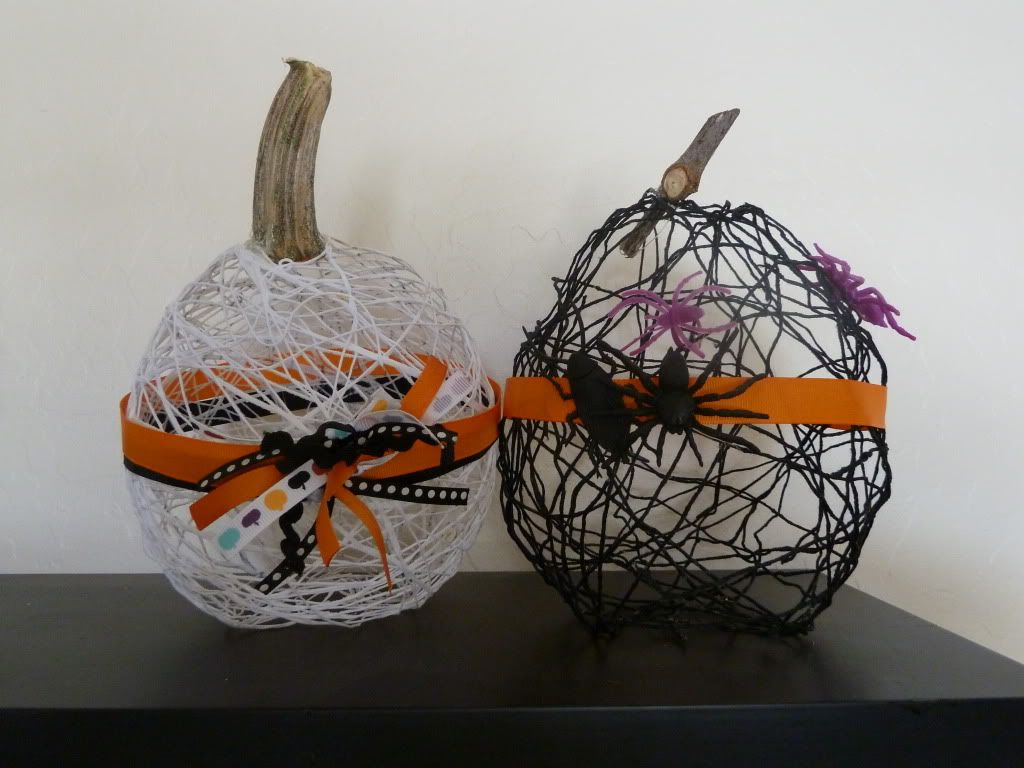 |
| As you can see, the more string the better! The black one is a little sad! |

But it looks great with your fall decor! AND if you cut a little hole in the bottom, you can stuff them with white Christmas lights. Wouldn't that be cute?
Friday, October 7, 2011
TGI Friday's Entrees for one
This is a Sponsored post written by me on behalf of T.G.I. FRiDAY'S for SocialSpark. All opinions are 100% mine.
Hey, this is Whitney's husband Ryan writing about T.G.I. FRiDAY’S “Entrées for One” today. Whitney went to the store and bought me some Orange Chicken Stir Fry to try out. They have a ton of flavors like Prime Rib Stroganoff or Grilled Chicken Mac and Cheese. Why she picked Orange Chicken I will never know. Maybe she was trying to make a healthy choice?

Here's the cool thing about this dinner. It is in a bag! And you cook it in a bag! And, let me tell you, this is not your typical frozen orange chicken. It tasted really good...so good that my 3-year old kept sneaking pieces until she had eaten half of it.

Another great thing about this dinner was that it was only $2 (on sale, I think). My children are starting to get close to the teen-age years, and they've started acting like hungry bears just coming out of hibernation at dinner time (as long as we make something they like), so leftovers at our house are rare. That leaves me always scrambling to find something to take to work for lunch. This is definitely a great choice for that. I guess I could always go to that one restaurant chain that rhymes with Manda Dexpress when I want orange chicken, but this is so much more in the budget.
* Hey, that's my husband! Isn't he a good sport to post for me? Gotta love him!
I also wanted to add that Fridays also has this really cool contest going on where you get to decorate your Freezer and win lots of prizes. It's called the Fun Freezer contest and it's over on their Facebook Page. You have got to stop by and vote for your favorite freezer!

Tuesday, October 4, 2011
Spooky Silhouettes
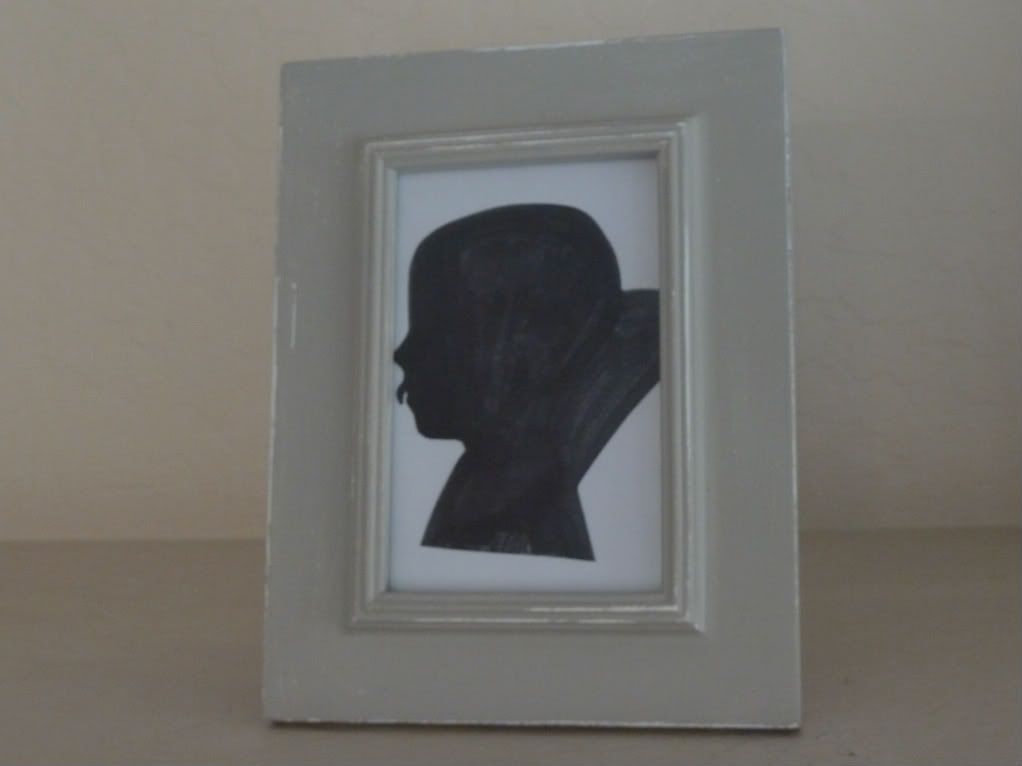
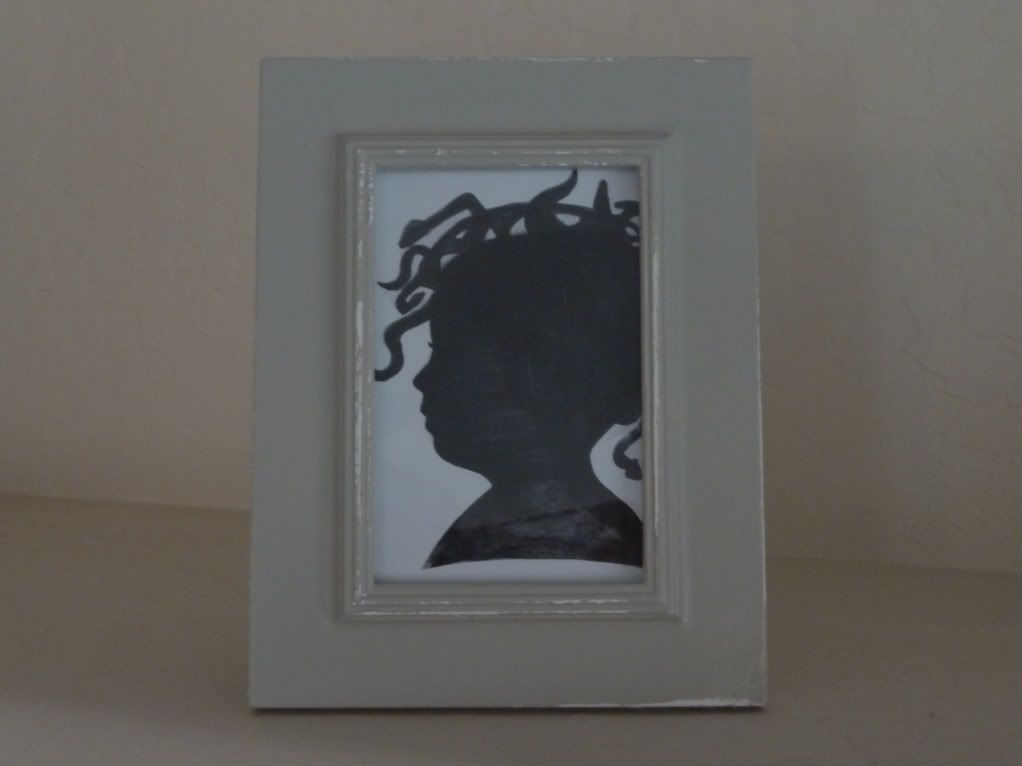
Last night I made the cutest spookiest silhouettes of my kids to put up on the mantel.
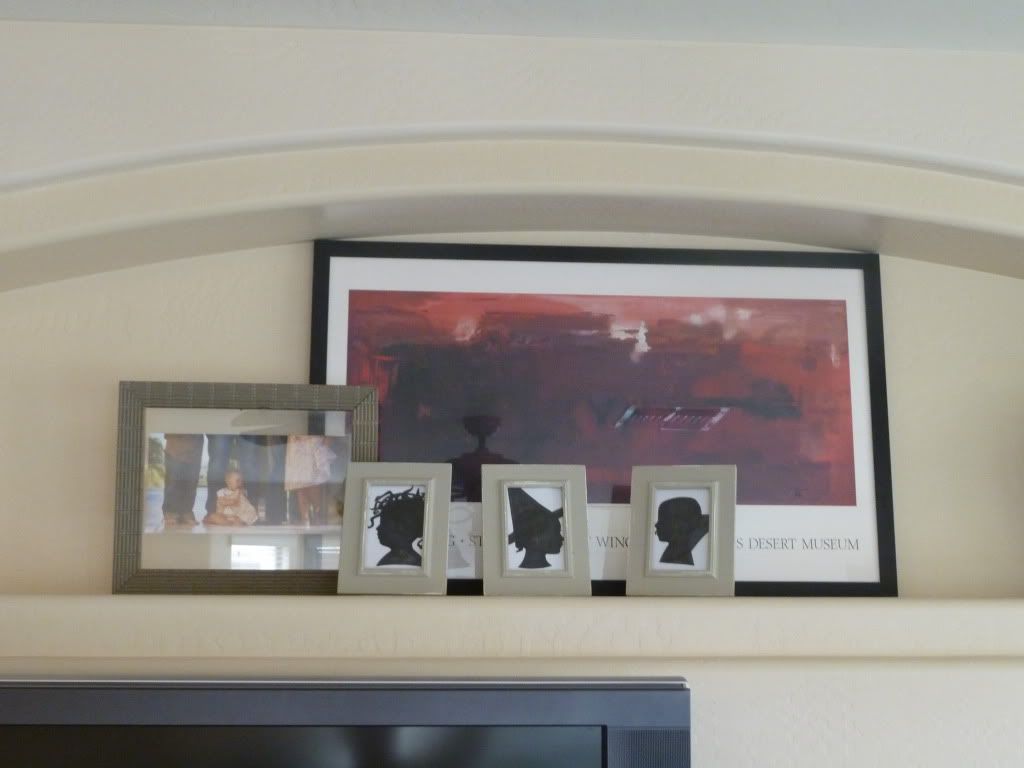
Aren't they great?
Here's the How to. First, take a profile picture of your child. Make sure you have a light background. Mine was a piece of poster board.
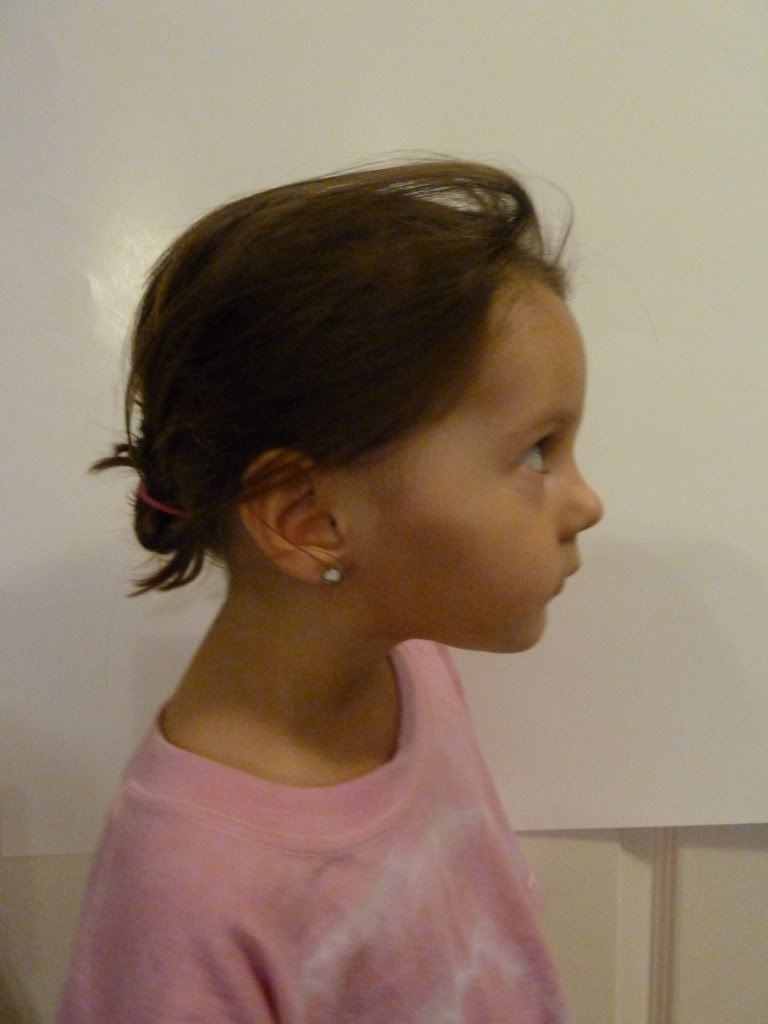
Next, print those photos off and color their faces in with a Sharpie. I added eyelashes to the girls.
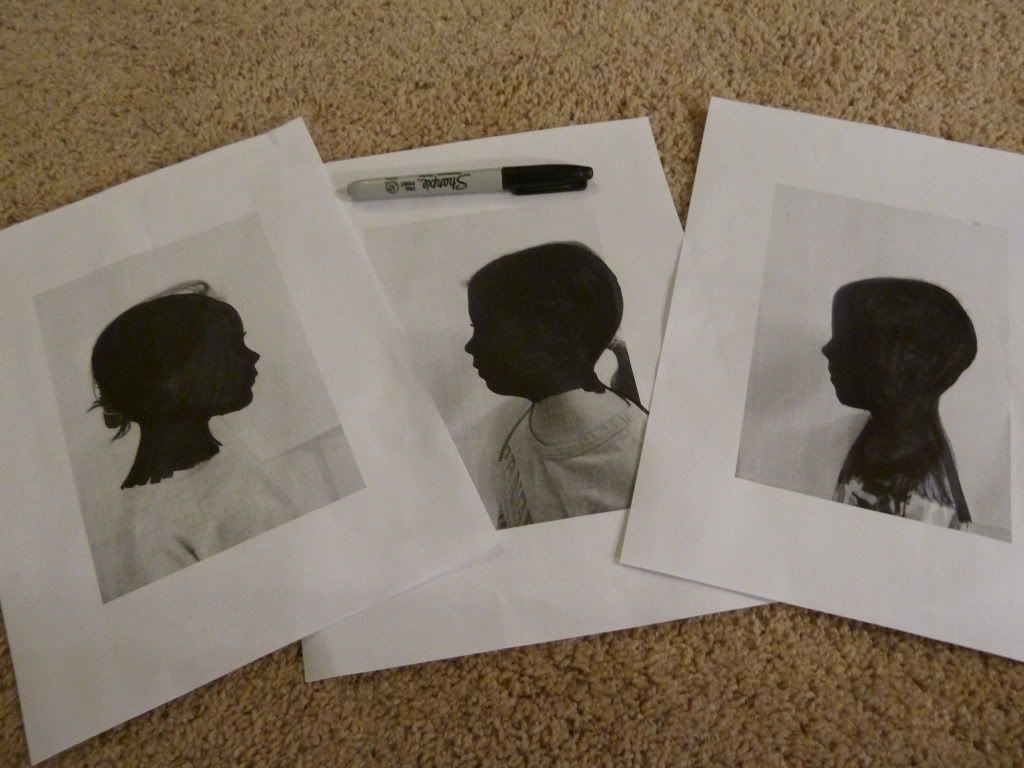
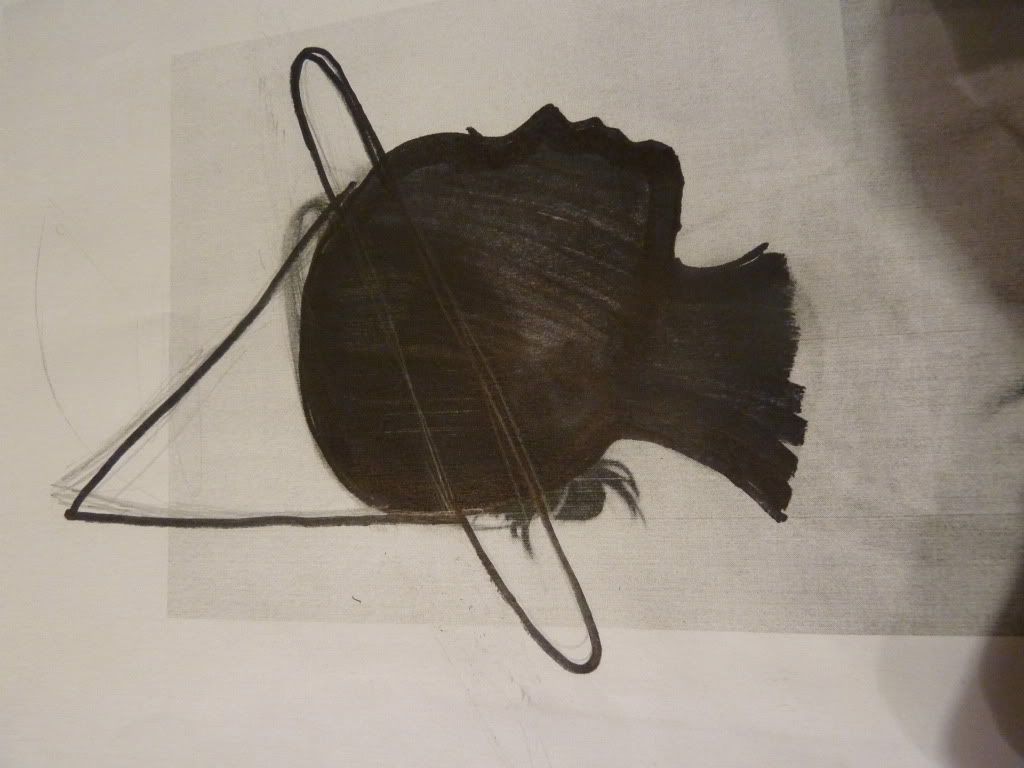
Add on any spooky embellishments, or leave it alone. I added a witches hat to this one, but you will see another has medusa hair, and my son was turned vampire. These characters have nothing to do with their personalities in real life. lol.
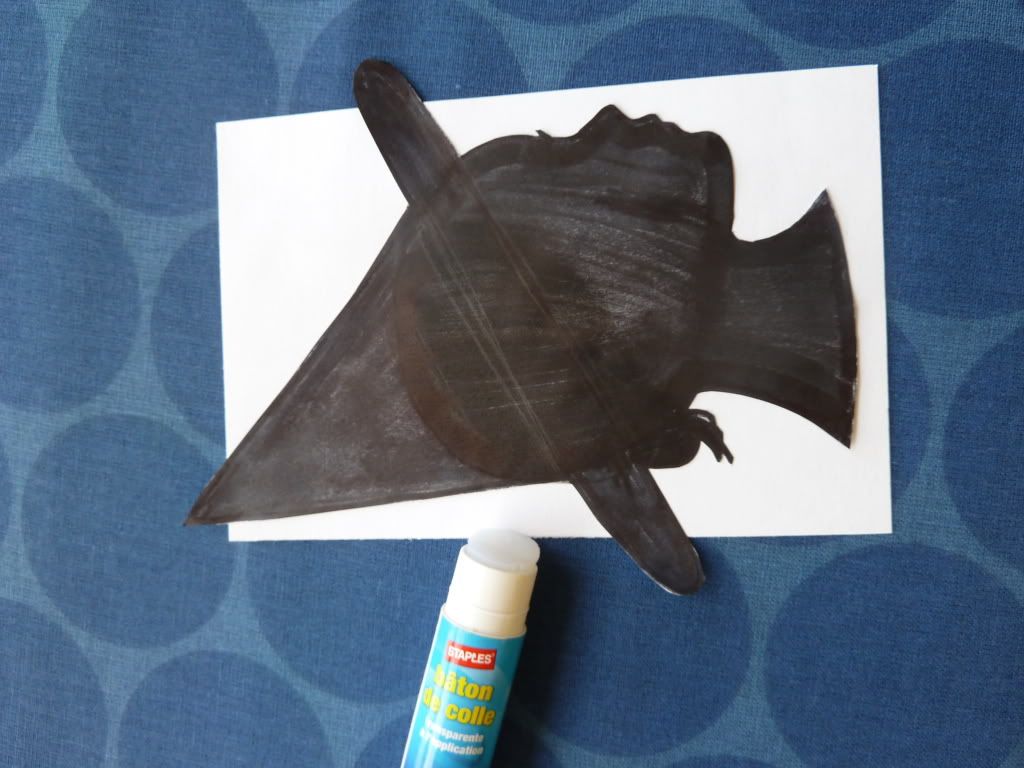
Cut around the silhouette and glue it on to white cardstock.
Stick it in a frame! I was a little disappointed that mine were a wee bit bigger than my frame. So make sure you take that into consideration when printing the picture. I also thought that Bride of Frankenstein and Frankenstein would be great, too.

Most important, have fun!
Linked today to Todays Creative Blog, Sassy Sites, Not Just a Housewife, Chef in Training, Sugar Bee Crafts, Home Stories A to Z, Centsational Girl, Funky Polkadot Giraffe, Dot Dot Dot, At Home with K, DIY by Design The Idea Room
Monday, October 3, 2011
Back Porch - Delicious
I did it! I organized that back porch!
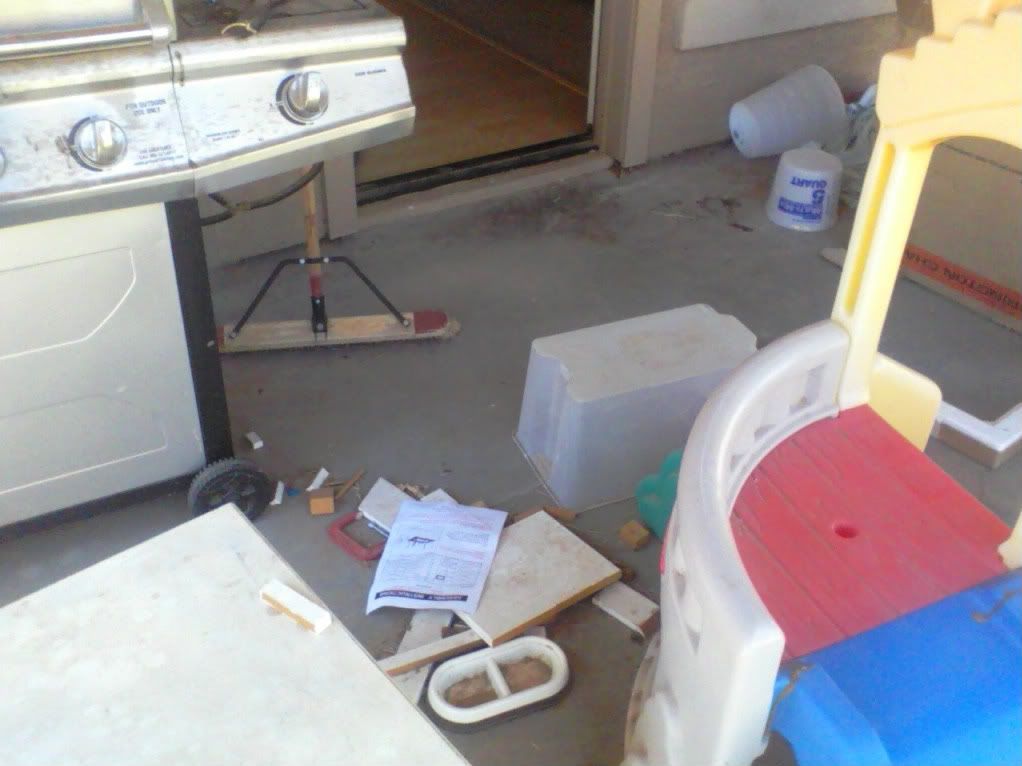
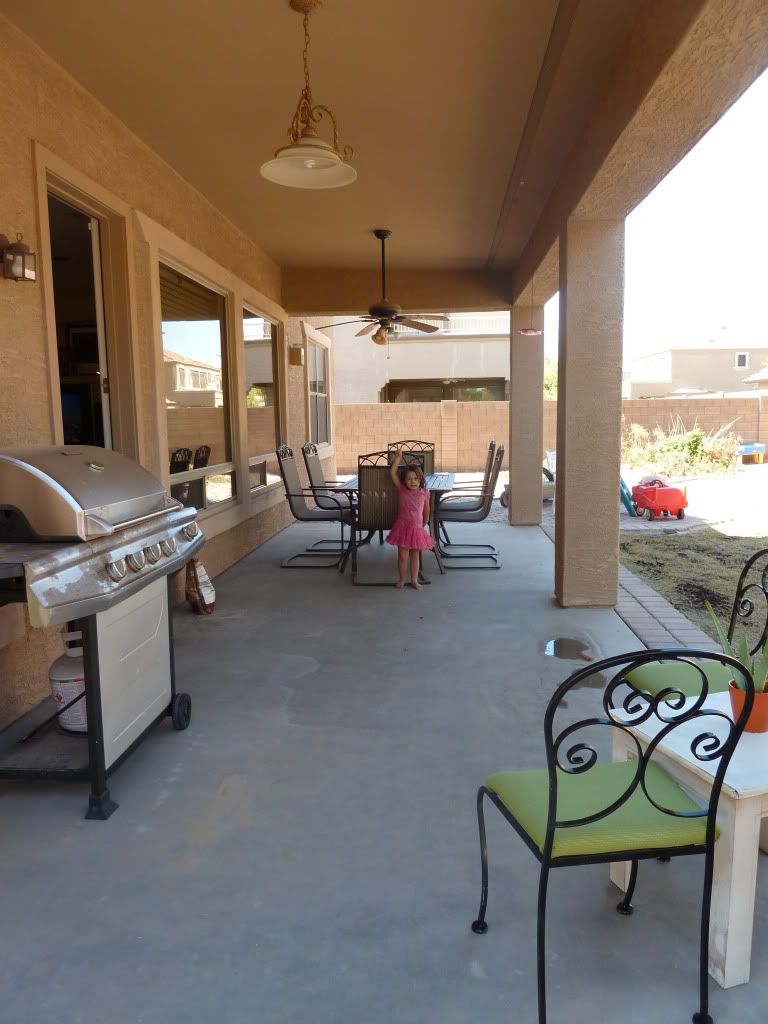
Remember this:
 Oh man, that whole entire porch was a disaster. And these chairs? Are you kidding?

I gave myself a budget of $10.
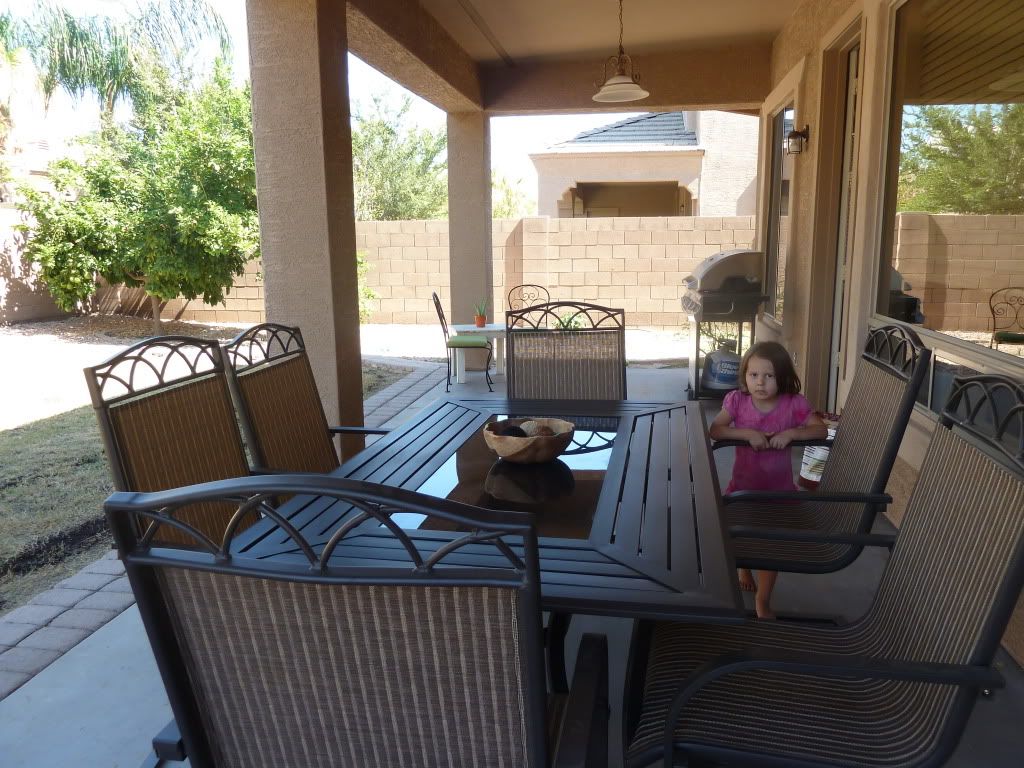
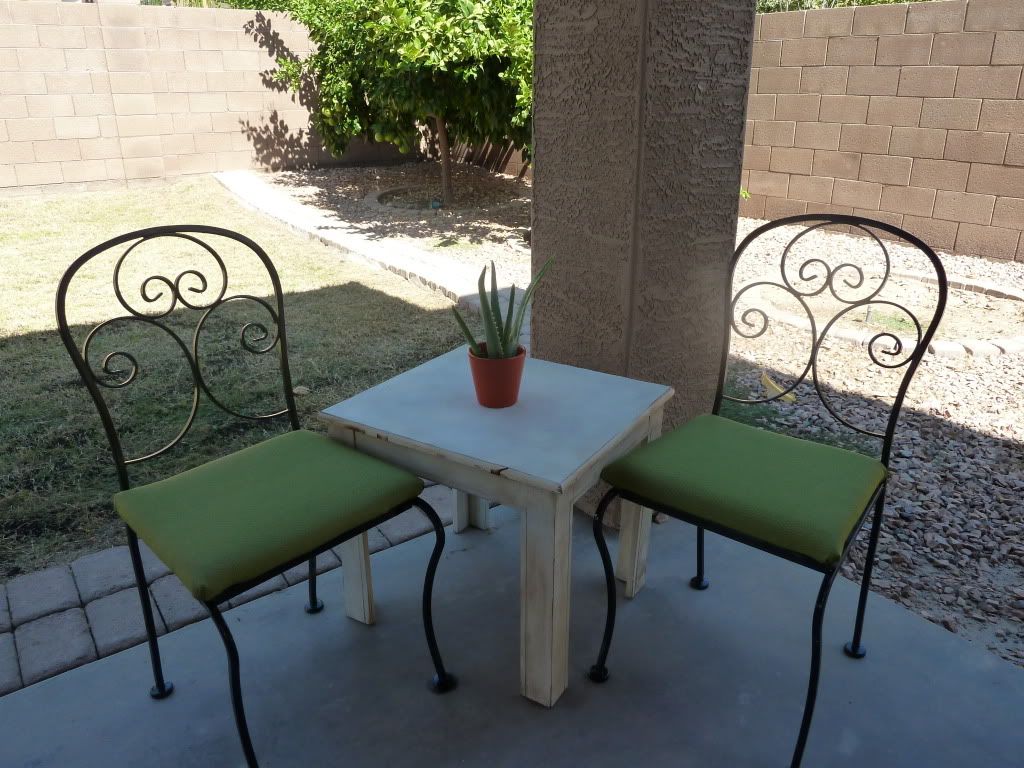
Not much, I know. But here is the result:


 So here is the low-down. I gave away all the old furniture I didn't need. I had way too much. And with all the stuff I find for free, there are times where I need to make someone else's day, too. :)
I swept and cleaned.
I spray painted and recovered my chairs with left over outdoor fabric and spray paint I had around the house.
Money spent: $2.00 on the cute aloe vera plant for a splash of color. I bought it at Fresh and Easy on clearance. If you don't have a Fresh and Easy near you I am so sorry. I LOVE that store.
$3.50 on some balls that I put in the middle of the table. I bought them at Hobby Lobby. Not sure if I will keep them there or not, though.
BUT, I am not done. I will keep this project for another week to show you some other fun things I plan to do for free (hopefully!). So tune back in for some more color at the end of the week!
And what about you? Did you get any organizing done this week?
Remember this:

I gave myself a budget of $10.
Not much, I know. But here is the result:
I swept and cleaned.
I spray painted and recovered my chairs with left over outdoor fabric and spray paint I had around the house.
Money spent: $2.00 on the cute aloe vera plant for a splash of color. I bought it at Fresh and Easy on clearance. If you don't have a Fresh and Easy near you I am so sorry. I LOVE that store.
$3.50 on some balls that I put in the middle of the table. I bought them at Hobby Lobby. Not sure if I will keep them there or not, though.
BUT, I am not done. I will keep this project for another week to show you some other fun things I plan to do for free (hopefully!). So tune back in for some more color at the end of the week!
And what about you? Did you get any organizing done this week?
Subscribe to:
Posts (Atom)