Remember this awesome cornice I made in my master bathroom?
Well, I thought I would show you how I made it. You are going to be shocked at how easy this is. First of all, I found the idea
here. If you are interested in hanging curtains underneath, I suggest reading her blog post. As this is a window above my bathtub, I went for just the cornice.
First, I started off with one of those 11" x 8 feet pieces of MDF board. You can see mine is already primed, but there is no need for that. For some reason my husband wanted that one. And when he is helping me with a project, I rarely contradict him. (yeah right!) OK, the truth is I sent him to Lowes and that is what he came back with, not seeing my vision yet. This board was only about $10.
Anyway, I measured the width of my window and added 6 inches (3 inches to each side.) That is the long piece. As for the 2 sides, I cut them 5 inches each. Now I borrowed a saw from my neighbor because we were doing the floor, but they will cut for you for free at Lowes! Just bring the measurements with you when you purchase the MDF.
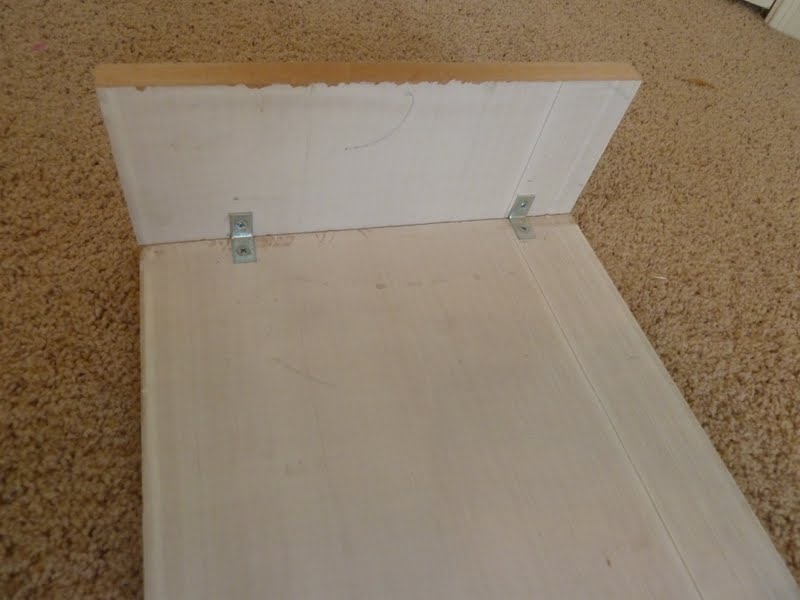
I bought 4 "L" Brackets and screwed the sides onto the long piece.


Next, I cut some batting and fabric. I bought this cute fabric at Jo-Anns. It was 50% off, and I needed 2 yards. It ended up costing me about $20 but I had so much left over. The batting was super cheap. Maybe $3?
Pulling tight and using a staple gun, staple to the wood, all around.
To hang, we bought 2 of these "L" brackets. They are a bit more heavy duty than the others I bought. First we attached them to the wall, measuring out that 3 inches. Ours happen to line up with the studs, but if yours don't, you made want to attach them with wall anchors. We do that with curtain rods, anyway, right? Then, I held up the cornice while my husband screwed the bracket to the cornice. This was a little tight fit for the drill. But it worked. phew. I guess we could have made it come out more than 5 inches and made it easier on ourselves. Tip for future projects. :)
And here you go:
 |
| finished product! |
And just in case you wondered, I recovered that stool! Doesn't it look great?


1 comment:
Hello matte nice post
Post a Comment